Need More Help?

Every effort has been made to ensure the accuracy of the tutorials contained within this website, however we do understand that you may have a question not answered on this site. If you require further help, please feel free contact us with the information provided below.


Contact SyTech Solutions


ExpressLink User Guide

Article Version: 0.1.0
Software Version: 2011.11.3.1158
Last Edit: 08-16-2013
Author: David Covey

- Select an Article -

Overview

ExpressLink is a light weight program created to easily upload your documents from any set "watch folder" directly into 1DocStop.com. ExpressLink has been designed to require little or no user interaction to seamlessly upload documents into 1DocStop.com.

Once ExpressLink has been setup, users will have an "upload" folder or shortcut on their desktop. This "upload" folder would then allow a user to simply drop a file into this folder and have it immediately upload directly into 1docstop.com. Alternatively, a user could have the watch folder setup to a scan location where the user would simply scan the document directly into the watch folder where it would then be automatically uploaded to 1DocStop.com

Documents uploaded into 1DocStop using ExpressLink will show up on the users DashBoard in 1DocStop.com. Users are then asked to Index the file to be searchable by any users in the system with rights to that document type.

Requirements

ExpressLink itself is a light-weight program, however it does require Microsoft's .Net Framework 4, and SQL Compact Edition 3.5 sp2 to be installed prior to the installation of ExpressLink.


Supported Operating Systems

  • Windows XP with Service Pack (SP) 3 (32-bit or 64-bit), Windows Vista with SP1 (32-bit or 64-bit), Windows 7 (32-bit or 64-bit), Windows Server 2003 SP2 (32-bit or 64-bit), Windows Server 2008 or later (32-bit or 64-bit).

Downloading ExpressLink

Tip: Before Installing ExpressLink, be sure SQL Server Compact Edition and .Net Framework 4 have been installed on your station.(If you have a 64-bit Operating System, be sure to install both the 32-bit(x86) and 64-bit versions of SQL Server Compact Edition 3.5 sp2.)

To download ExpressLink to your system, first you will need to log into https://www.1DocStop.com. Once you have successfully logged into 1DocStop, follow This Link to download ExpressLink.

When you have followed the above link, click on the "ExpressLink Download" and save the .zip file to your desktop.

Getting Started

To install ExpressLink, browse to the desktop where you saved the .zip file containing the ExpressLink setup Files. (unless renamed when you downloaded the expresslink setup .zip, the file will be named: "expresslink.zip").

If you don't have expresslink.zip, please see the previous chapter for the download link.

Open the .zip file and you will see the program files for ExpressLink

There will be 6 files inside the expresslink.zip folder.

Browse to your "C:\" drive and create a new folder called "ExpressLink".

After creating the folder on your "C:\" drive, open "expresslink.zip" and "copy" the contents. (6 files.)

Once you have copied the contents of "expresslink.zip", browse to the Expresslink folder you created on you "C:\" drive. "Paste" the files you copied from "expresslink.zip" into the "ExpressLink" folder located on your "C:\" drive.

Have ExpressLink Startup When Windows Does

To have ExpressLink startup automatically when Windows does, you will need to add an ExpressLink shortcut to the windows startup folder.

To add an ExpressLink shortcut to the windows startup folder, you will first need to browse to the ExpressLink folder we created earlier.

In a typical installation, this folder will be located at: "C:\ExpressLink".

Once you have opened the ExpressLink folder, find the executable file for ExpressLink called “ExpressLinkCloudEdition.exe”. Right click this file, and select “Create Shortcut”.

This will add a new file to this folder called “ExpressLinkCloudEdition.exe – Shortcut”

After you have copied the “ExpressLinkCloudEdition.exe – Shortcut” file, go to the Windows Start menu at the bottom left of your screen.

Click the “Windows Orb (Windows Vista/7)” or the “Start Button (WindowsXP)”.

Where it says “All Programs” “Right Click”, a menu will pop up, select “Open All Users”.

Open the “Startup” folder and “Right Click” anywhere in the white space of the window. A menu will popup, select “Paste”.

A new file will appear that we copied earlier from the ExpressLink folder, called “ExpressLinkCloudEdition.exe – Shortcut”.

Once this file has been copied into this folder, ExpressLink will now start automatically when Windows does.

Launch ExpressLink For The First Time

To run ExpressLink for the first time, browse to the ExpressLink folder you created earlier: “C:\expresslink” and double click on the file called “ExpressLinkCloudEdition.exe”. This file will launch ExpressLink.

When you run ExpressLink for the first time, you may see a Windows Security Warning asking if you are sure you want to run this software. Click “Run” to launch ExpressLink.

Tip: Make sure “Always ask before opening this file” is UNCHECKED. This will prevent you from seeing this message box every time you run ExpressLink.

Tip: If you have launched ExpressLink and the ExpressLink Window has not opened, ExpressLink has minimized itself to the taskbar in the windows system tray.

To open the ExpressLink Window, go to the bottom right of your screen.

The Windows system tray is located at the bottom right next to the system clock. Double click the ExpressLink Icon to display the ExpressLink Window.

Tip: depending on version, the Expresslink Icon may be a green circle with white arrows, or a green circle with blue arrows around it.

User Login

Before you can log into ExpressLink, you must first be enrolled into 1DocStop.com. ExpressLink uses the login information from 1DocStop.com to give the user a list of all available document types, and to track the documents being uploaded by each user.

Tip: If you don’t have login information for 1docstop.com, please check your email for “admin@1docstop.com” If you haven’t received an email from ”admin@1docstop.com” please talk to your Administrator, or call Sytech Solutions at (916)381-3010. Without login information to 1DocStop.com, you will be unable to log into ExpressLink.

With the ExpressLink Window is open, you will need to Login to ExpressLink. Select “Sync” and click “Login”.

To open the ExpressLink window, see the previous section "Run ExpressLink".

Once you clicked “Login” from the “Sync” menu, you will need to enter your email address, and your password.

Tip: The email and password used to login to ExpressLink is the same email and password used to log into www.1docstop.com.

Administration Tip: If you are installing ExpressLink on multiple stations, make sure you have the user of that station use their login information, and not your own. Each Login should be unique. This way you can track who uploads documents to www.1docstop.com

Creating the Watch Folder

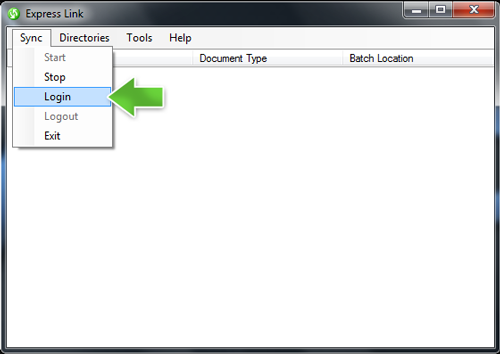
When you have successfully logged into ExpressLink, you will then need to create upload folder(s) for ExpressLink to "watch".

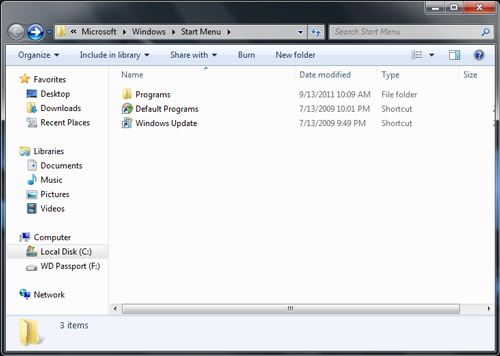
To set up the directory for ExpressLink to watch, first you will need to create the folder(s) on your computer.

Tip: ExpressLink can be set up to watch any folder. The watch folder can be a local folder located on your computer, or a network folder located anywhere on a server. In this example we will create a folder for ExpressLink to "watch" inside the ExpressLink folder located on the ( C:\ drive ).

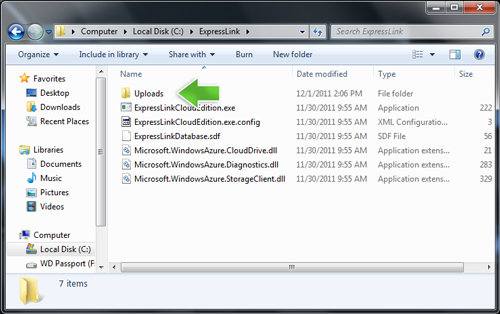
To begin, create a folder inside the ExpressLink folder located at ( C:\ExpressLink ) and name this new folder "Uploads".

Tip: This folder can be named anything you want, in this example we simply named it "Uploads".


Configure ExpressLink to Watch the Folder

Once the "Uploads" folder has been created we need to configure ExpressLink to "watch" this folder so it can upload the contents to 1DocStop.com.

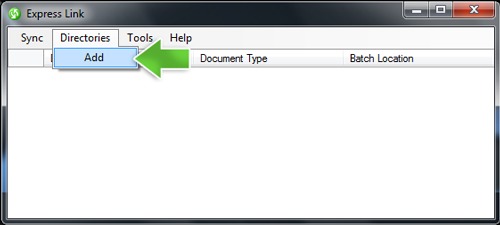
To open the add directory dialog select "Directories" then select "Add". This will open the "Add Directory" window.

If you need help opening the main ExpressLink window, please see the section: "Run ExpressLink".

With the "Add Directory" window open, we can now setup ExpressLink to watch the "Uploads" folder we created earlier. This window asks you what "Solution" (for Admin purposes) you would like this folder to upload to, what "Document Type" the documents contained in the folder are, and the "Directory Path" (where the images are located).

To setup ExpressLink to watch the Uploads folder, we will need to fill out the "Add Directory" menu. Here is how we do that, and what each field means:

This field is for Administration purposes and in most cases can be left at the default solution.

Solution: is a dropdown box containing all the solutions available to the user. A solution is exactly that, a solution that contains multiple document types, its own website basically.

(There will usually only be one available to a standard user. This is typically for Administration purposes.)

Document Type: is a dropdown box containing all the different document types available to the user. Here we will select the appropriate document type we want to upload to 1docstop.com. If we for example, choose a document type of Employee Data Files, when we drop a file into the upload folder, the document will be uploaded to 1docstop.com as an Employee Data File.

Directory Path: is the path to the folder we want ExpressLink to watch and upload the contents to 1docstop.com. In this example we will be using the folder we created earlier located in “C:\ExpressLink\Uploads”.

This is a batch directory: is a checkbox that is for batch uploads. In a typical setup, we will leave this unchecked. This box is used with programs such as Kofax Express that uploads not only images but the index information that goes with them.

Now that we have filled in the required information, click the "Add" button at the bottom right. This will add the directory to the watch list and close the "Add Directory" window.

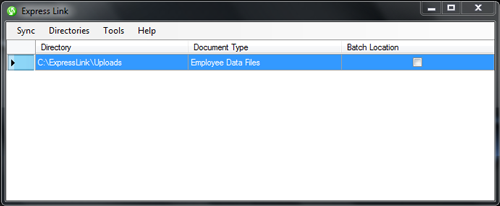
When you have added a directory to ExpressLink, you will now see your Document type and the Directory path to that document type you added to ExpressLink in the main window. This will verify that you added the directory. When you add an image file to the directory in this list, it will then be uploaded to 1docstop.com automatically.

Additional Information: You can follow the above setup steps and create as many watch folders you want for each document type available for the user.

For Example if the user has two or three document types such as: Student Files, Employee Files, and HR Records, you could create a folder inside the “C:\ExpressLink\Uploads” folder for each document type available to the user.

The folder structure would look like:

  • C:\ExpressLink\Uploads\Employee Files
  • C:\ExpressLink\Uploads\Student Files
  • C:\ExpressLink\Uploads\HR Records

After setting up the folders in Windows, you would then follow the “Configure ExpressLink to Watch the Folder” steps for ExpressLink, to setup each folder with the appropriate Doc type. Once you have added each folder to ExpressLink, when the user places an image into “C:\ExpressLink\Uploads\Employee” folder it would be uploaded as an Employee File, if however they placed the image into “C:\ExpressLink\Uploads\HR Records” folder, it would be uploaded as an HR Record and so on.