Need More Help?

Every effort has been made to ensure the accuracy of the tutorials contained within this website, however we do understand that you may have a question not answered on this site. If you require further help, please feel free contact us with the information provided below.


Contact SyTech Solutions


1DocStop User Guide

Article Version: 0.1.0
Software Version: 0.2.0
Last Edit: 08-16-2013
Author: David Covey

- Select an Article -

Overview

1DocStop is a cloud-based web application designed for the specific purpose of meeting document and data management tasks.

While originally developed as a repository for storing and searching document with strict retention requirements, the application has evolved significantly to include support for varying data types including non-document specific records.

Some of the new features available with our latest cloud edition include:

  • Web Capture: Authoring of new records and documents through a web based interface.
  • Charting: Functionality to analyze data using a combination of visual queries and / or maps.
  • Excel Export: Additional analysis can be run using Microsoft Excel by exporting the data to take advantage of the rich analysis tools available in Excel.
  • Improved Search: New search interface with advanced options including pick lists and "between" searches.
  • ExpressLink: Microsoft Windows utility for automatically uploading files from your PC to 1DocStop.com through the use of watched directories or "Hot Folders".
  • Attachments: Support for attachment of supporting files to a document stored within the application.
  • Open Cloud API: Open framework to allow for the development of 3rd party applications to ADD / Connect To / Manage Documents / Data to the application.

User Interface

The 1DocStop two menu bars, the top main menu bar and a secondary bottom bar. The top bar is the main control menu, while the secondary (bottom) bar changes to reflect the selection from the main bar.

Home Screen Overview

1. Main Menu Bar: The standard user menu bar will have 2 selections available to them: Home, Help. At anytime the user can select Home to return to the dashboard. (administrators will have many more functions)

2. Secondary Menu Bar The secondary menu bar will have numerous selections available to the standard user. The secondary Menu Bar allows access to the Dashboard, Find Documents, Add Documents, Drafts, and Clipboard.

3. Dashboard The dashboard is the main screen you come to upon logging into 1DocStop.com. If the user has added documents to the repository (either through the "Add" function or ExpressLink), but has not fully indexed the documents, they will appear on this screen until the user finishes indexing the document(s). Once the user completes the index of the document on their dashboard, the document will be removed from this screen and become available for search by anyone that has rights to view the document.


The Document Viewer Toolbar

1DocStop.com uses Adobe Acrobat Reader / Pro to view documents. The following viewer guide assumes at least Adobe Reader-X is installed.

The Document Viewer Toolbar enables the user to quickly affect page view changes, and various output options, such as print, and save. (Shown is the Adobe Acrobat Mini Toolbar)

Button Button Name Description
Save Saves the document to a location on your local or network drive.
Print Prints the selected page(s) to a Windows compatible printer device.
Previous Page If the current document has multiple pages, this returns to the previous page in the document.
Next Page If the current document has multiple pages, this will allow you to go to the next page in the document.
Page Counter If the current document has multiple pages, this counter will show the total and current page(s).
Zoom / In Zoom the current page in the document in.
Zoom / Out Zoom the current page in the document out.
Close Mini Acrobat Bar Hides the Adobe PDF Viewer mini toolbar. (this will allow the use of the standard Acrobat toolbar)

Enrollment

When a user is enrolled into 1DocStop, they will receive a "Welcome to 1DocStop" email. The email will have several important items in it.

Additional Information: The email will be sent automatically from: "admin@1docstop.com". If for some reason you did not receive your welcome email, check your junk email folder. If you still have not found the welcome email, call our support line at: (800) 814-8324.

Email Contents

  • Link to Help Videos Online.
  • Link to www.1DocStop.com.
  • Email address registered with your user account.
  • Temporary password automatically generated by the system.

These items and a web browser are all you need to access your 1DocStop repository.


Logging In For the First Time

Once you have received your welcome email, you can now click on the link to proceed to 1DocStop.

https://www.1docstop.com/login.aspx

Login Window

When you first arrive at 1DocStop.com, you will be required to enter your email address and temporary password. This information is contained in the Welcome Email. (See previous section)

If you would like 1DocStop to remember your login information on the PC you're currently using, you can check the option box labeled: Remember me on this machine.

Warning: Be sure you leave the checkbox "Remember me on this machine" (UN)checked if you're logging into 1DocStop.com using a public computer.

If "Remember me on this machine." is checked and you do not wish to keep your login information saved, make sure you click the "Log Out" button in the main toolbar (to right corner) when you are finished using 1DocStop.com


Accessing 1DocStop

For new user accounts (and accounts that have been reset for various reasons) there are a few steps to complete the login process.

Step 1: Agree to the End User License Agreement and Terms of Use.

Step 2: Change your temporary password. Ensure this new password is easy to remember while still keeping it secure.

In this step you must enter your temporary password included with the Welcome Email, then enter a new password of your choice. This new password must be entered in twice to ensure the accuracy of your new password.

Tip: Create a password with a combination of letters and numbers for the strongest possible password.

Step 3: Verify the spelling of your name. In this step you can make any necessary corrections to you name before you proceed to 1DocStop.

Step 4: Proceed to 1DocStop. This is the final step of the initial setup. Press the "Proceed to 1DocStop" button to finalize any changes you have made, and you will be directed to your dashboard in 1DocStop.

Landing Page

The Dashboard is the default landing page for the 1DocStop application.

Depending on your organization's application configuration, you may have different options available to you. Please refer to the solution - specific documentation for your organization's site at: https://www.1docstop.com/help/aboutmysolution.aspx

The Dashboard's configuration is designed to provide you with a list of documents that may require your attention. When the Dashboard contains a list of documents, they either require indexing, have been forwarded to you buy another user, or are in an error state for one reason or another.

Typically when you log into 1DocStop for the first time, the Dashboard will be empty as shown here.

The screen shot here shows what the Dashboard looks like while it's being populated with documents that require the user's attention.

Searching for Documents

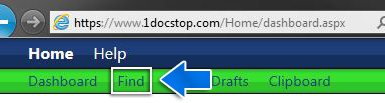
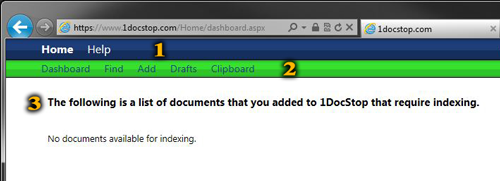
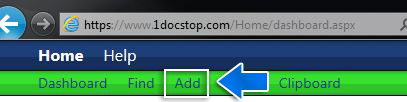
Finding documents in 1DocStop is designed to be as simple as possible. The Secondary Menu Bar (green bar) contains the find function. Simply click "Find" on this bar to get started searching for documents.

Additional Information: If the Secondary Menu Bar does not contain the "FIND" button, click the "HOME" button on the Main Menu Bar to display the proper Secondary Menu Bar that contains the "FIND" button. (refer to the section on toolbars for more information)


Start a Search

Clicking on the "Find" button will take you to a new screen. To help narrow down your search, this screen will have the first set of options to choose from.

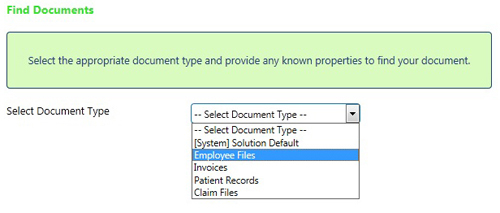
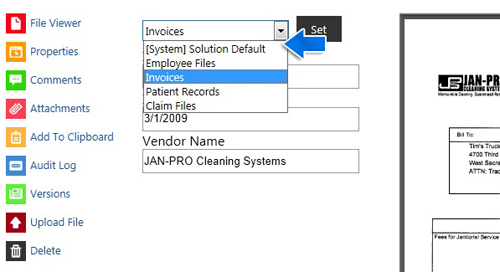
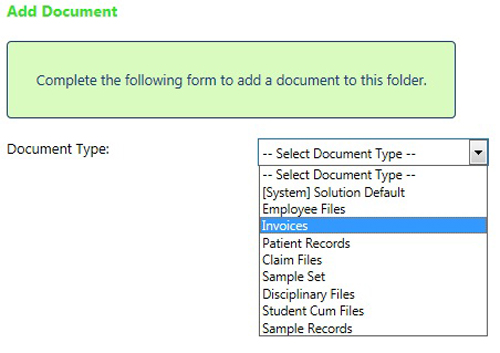
The first screen you see when you being your search will ask you to choose your document type. Depending on your solution this list will have many document types to choose from. Simply choose the document type from the list for the document you're trying to locate.

Note: The document type labeled: "[System] Solution Default" will always be present. This document type is a default document type. If a user has not assigned a document type to a specific document this document type will automatically be assigned so the document does not get lost.

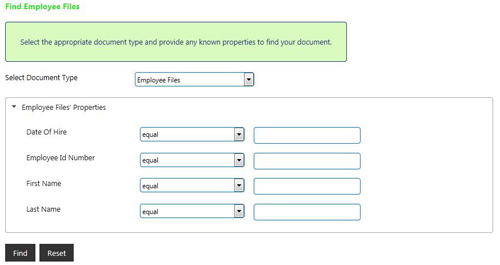
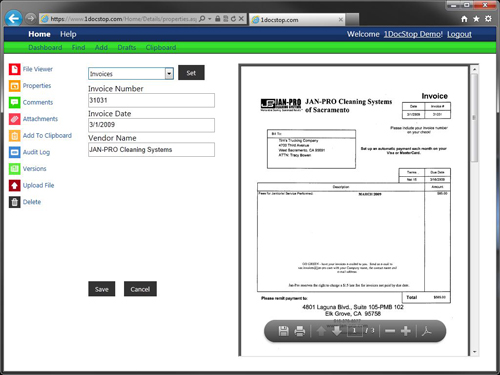
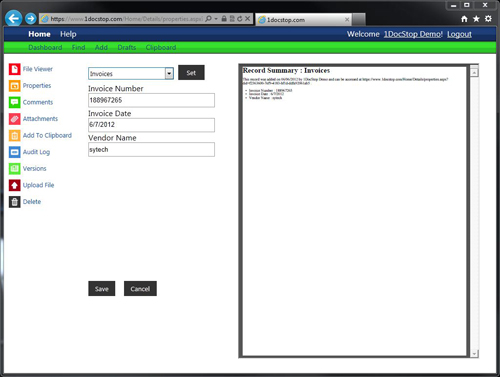
Once you have selected the appropriate document type, the form will change to reflect the available properties/index fields for the chosen document type. Here you can enter the information for the document you are trying to locate.

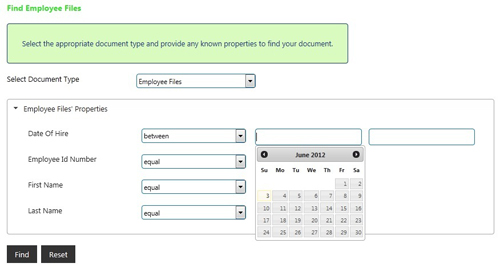
You can use the filter options from the dropdown to help narrow the search to only those documents you are currently looking for. When you have completed your filter, click the "Find" button.

Additional Information: If you leave the search fields blank and click "Find" the system will perform a search for every record whithin the document type you specified.

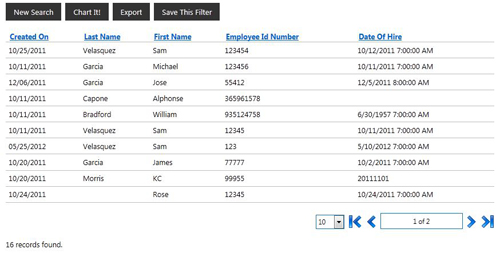
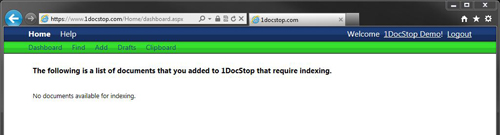
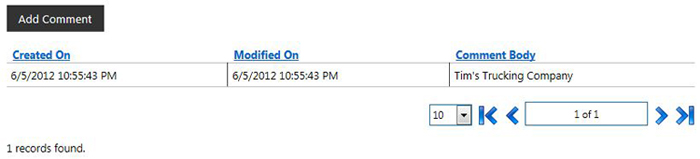
Clicking the Find button will start the repository search. You will then be presented with a list of documents that match the criteria you previously specified.

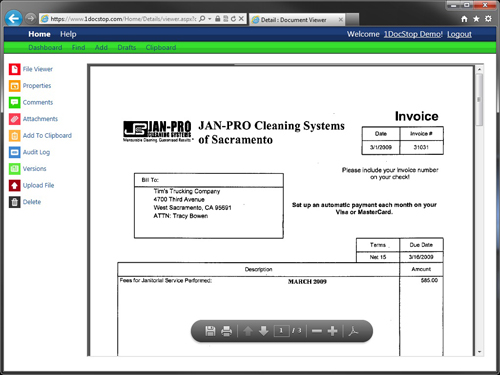
Select any document in the list to view the document and it's profile fields.

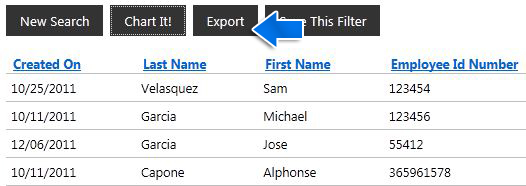
Tip: You can organize the search results by clicking on the title of the index fields. For example if you want to order the results by last name, click the blue "Last Name" title and the system will organize the results in alphabetical order (A-Z). Click the same title a second time to re-order the results (Z-A).


Chart the Search Results

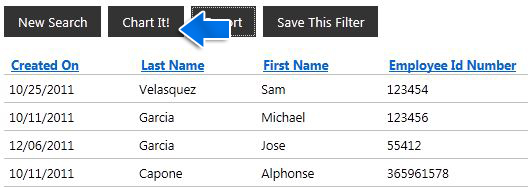
1DocStop has the functionality to provide graphic charts based on search results. Search result information will then create a chart from the index values you chose. To access this feature click "Chart It" on the search results page.

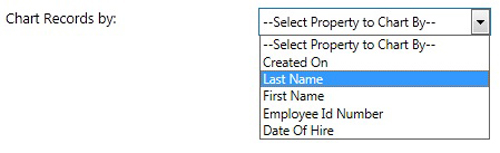
Once you have clicked "Chart It' from the search results window, you will be asked to specify which document Property/Index Fields to chart. Select the Property/Index name from the dropdown list.

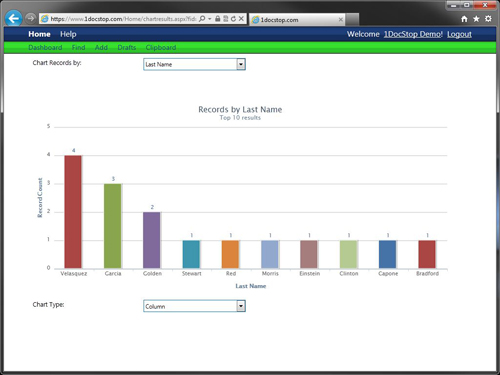
After you have chosen the Property/Index Field to chart against, your chart will automatically be generated based on the values from your original search results.


Exporting Find Results

1DocStop has the functionality to provide a spreadsheet containing the results of a search. This file saves as a .CSV file which can be opened with Microsoft Excel, or any other spreadsheet application. To save the search results click "Export" at the top of the search results page.

After clicking the "Export" button, your browser will download the .CSV file. Click the "Open" button when prompted and your browser will launch Microsoft Excel or another application if Excel is not available.

Viewing Documents

Selecting an item in the "Find Results" window, will open the related document.

By default, the document viewer will be in full page mode only showing the document.

Additional Information: If the adobe toolbar doesn't appear on the document, hover your mouse cursor over the bottom portion of the image and the toolbar will appear. (Refer to the section on toolbars for more information.)


Document Properties

To view the current documents properties, such as index information. Click the "Properties" button to the left of the viewer window. This will create a split screen view with the document viewer and the list of the properties associated with the document currently being viewed.

Additional Information: Saving any changes to these fields requires "Modify Access". Contact your Administrator for more information.

Reclassify a Document

Reclassifying a document in 1DocStop is designed to be as simple as possible. If for one reason or another a document is found to be the wrong type, you can easily change that document to another type.

Additional Information: The following instructions assumes you have "modify" rights to the document type you're currently attempting to change. If you cannot change the document type using the described method, you do not have sufficient rights to complete that action. Please contact your Administrator for more help.

To reclassify the document you are currently viewing, simply use the dropdown list at the top of the properties (index) list.

Tip: If you do not see the properties for the document you're currently viewing click "Properties" on the bar to your left, and the properties/indexes will appear. (Refer to the section Document Viewer)

Whithin the dropdown list you will find all the document types available to your solution. Simply select the appropriate document type from the list and then click the "Set" button. Once the document type has been changed, the index fields will change to refelect the new document type chosen.

Warning: Be extremely carefull when you Reclassify a Document. Reclassifying a document from one type to another will change it's index fields (unless both document types have exactly the same fields). If the document has already been indexed and you change the document to another type the Index information will be lost and the document will need to be re-indexed.

1DocStop Comment System

1DocStop has been designed to allow the use of comments. A user can access this feature to share information about a document to other users in the system.

Additional Information: The following instructions assume you have "modify" access to the document.

Add Comments

Comments can be added and viewed by clicking the "Comments" button on the toolbar. A comment is document-specific and will follow the document through its lifecycle.

Authoring a new comment is very seasy. Once you click on the "Add Comment" button, you simply type your comment into the "Comment Body" text box.

Once you have finalized your comment, click the "Save" button to save your comment to the document.


View Comments

To view a comment, we follow the basic steps of adding a comment. Click the "Comments button on the toolbar. If the document already has a comment or multiple comments, they will be displayed in the list.

Clicking on a comment in the list will allow you to view the full comment. (If you're the original author or an Administrator you can edit the comment as well.)

Importing Documents Into 1DocStop

There are a number of ways to add documents into the 1DocStop repository. Described in this tutorial will overview the method for adding a document from within the online interface.

Additional Information: An alternative to uploading documents into 1DocStop would be to use ExpressLink. ExpressLink is a light weight program created to easily upload your documents from any watch folder directly into 1DocStop.com. ExpressLink has been designed to require little or no user interaction to seamlessly upload documents into 1DocStop.com

For more information on ExpressLink refer to the tutorial section for ExpressLink located here: ExpressLink Information

Additional Information: Adding documents into the 1DocStop repository requires "create" access. Contact your Administrator if you're unable to upload documents into the system.

To add a new document into the 1DocStop repository, click the "Add" button from the "Secondary Menu Bar".

Once you have clicked the "Add" button, you will be asked to select a document type before you can proceed.

Additional Information: If the document type you're attempting to search for isn't displayed in this list, then the group you're in doesn't have rights to view the documents from that type.

If you need access to a specific document type and you don't see it in the list, please contact your Administrator so they can assign you the proper rights.

After selecting the document type for the document you wish to add, a new form will be generated. This new for will allow you to enter the new document's properties/index fields.

Once you have entered the index information, you can then upload the document associated with the index fields you entered into this form.

Additional Information: You can also save the index information as a Draft.

A Draft is a place holder for a document that has no image uploaded. Saving as a draft allows you to save your index but upload the document at a later time. You can review your drafts by clicking the "Draft" Button on the "Secondary Menu Bar".

After saving the index information, a new document will be created and you will then be taken to the document viewer screen.

The new document will have a placeholder image. You will notice your index information is in the properties window just to the left of the placeholder image.

The next step is to upload the corresponding image that goes with the index information that we added earlier. To upload the image simply click "Upload" from the menu bar on the left.

You will then be taken to a new screen where you can browse the file system of your computer and choose the appropriate file to upload.

After choosing the file to upload, click the button "Upload File".

When the file has completed uploading, you will be taken back to the document viewer. You will now be able to see your new uploaded document diplayed.